Products
Solutions
Resources
9977 N 90th Street, Suite 250 Scottsdale, AZ 85258 | 1-800-637-7496
© 2024 InEight, Inc. All Rights Reserved | Privacy Statement | Terms of Service | Cookie Policy | Do not sell/share my information

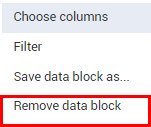
From the Workspaces page of the Steel Structure Job, remove each data block from the page, except for the Tasks and Task Details data blocks, by right clicking on the context menu.

For each data block you plan to remove, select Remove Data Block
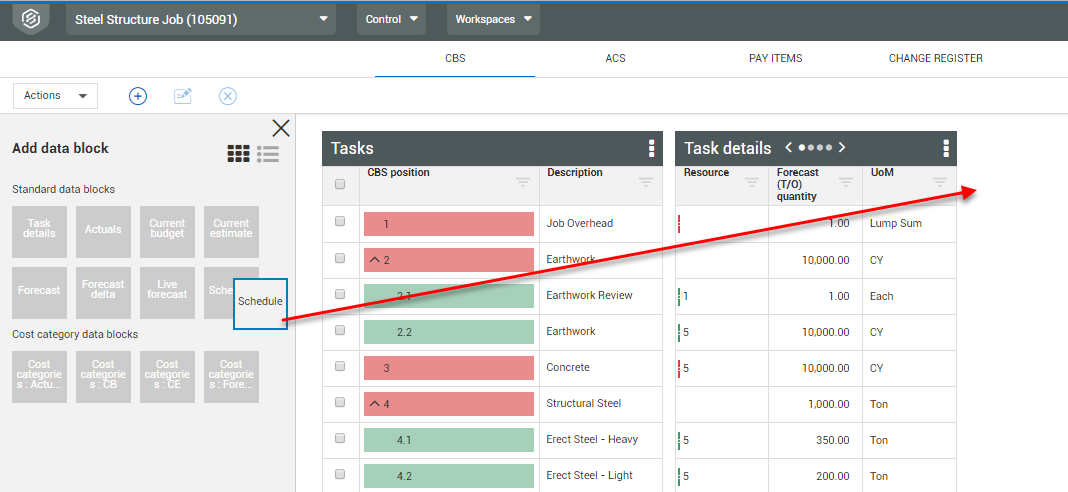
Once the data blocks are removed, click the Add Data Block button.

Drag and drop the Schedule Data Block to the right of Task Details.
Select Module [your initials] – [description.]

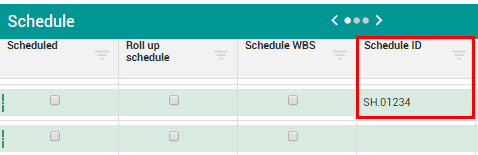
In the schedule data block, type your Initials.01234 in the Schedule ID field.
Click the right arrow to move to next set of columns in the schedule data block.

Double click into each field and enter the following:
Start = 10/05/2020
Finish = 10/15/2020
Early Start = 10/01/2020
Early Finish = 10/15/2020
Late Start = 10/07/2020
Late Finish = 10/15/2020

Entering dates on any terminal CBS item will auto-populate the parent’s dates. If there are multiple terminal items under one parent, any start dates will take the earliest and any finish dates will take the latest
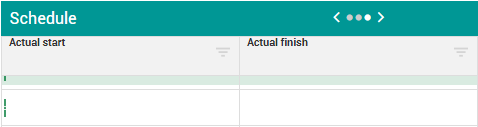
Once all the initial schedule dates are entered, the schedule data block also allows for the project to track actual dates
Click the Right Arrow to move to next set of columns in the schedule data block.
You will leave these columns blank for this Step by Step
From the Workspaces page, using the Schedule view on the CBS tab, click the Export button, then CBS as CSV.
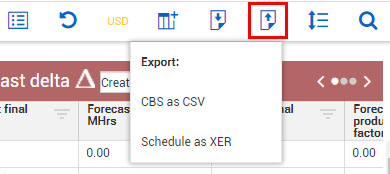
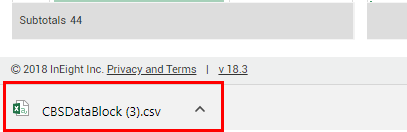
This creates a CBSDataBlock folder in your Downloads folder
Open the CBSDataBlock.csv file.
Inside the Excel spreadsheet, delete all rows except for Module [your initials] – [description].
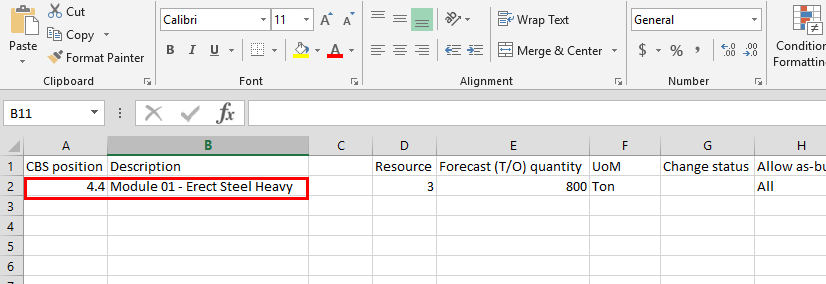
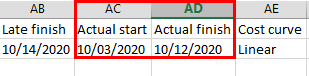
Enter the following:
Actual Start = 10/03/2020
Actual Finish = 10/12/2020
Save the file to your computer (as .xlsx, .xls, or .csv).
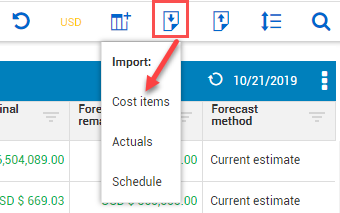
From the Control > Workspaces page, click the Import button for Cost Items.
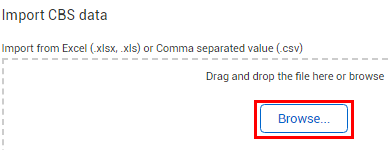
Click Browse to select your Excel file.
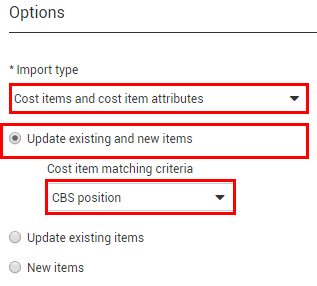
Select Cost Items and cost item attributes, Update Existing Items and CBS position.
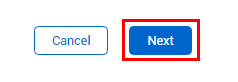
Click Next.
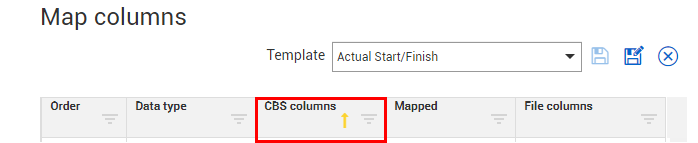
Next, you will map which columns from the Excel sheet get imported to which columns in Control. Click on CBS Columns to sort A-Z.
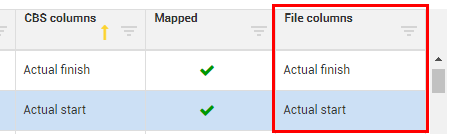
Under File Columns, match Actual Finish and Actual Start to the CBS columns description.
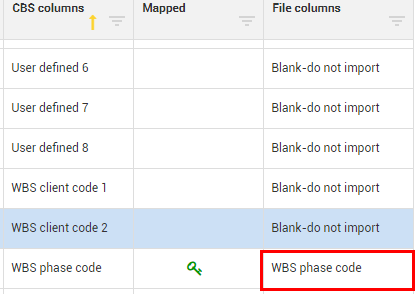
Do the same for WBS Phase Code.
Click Next.
The actual dates you specified import into the Schedule data block

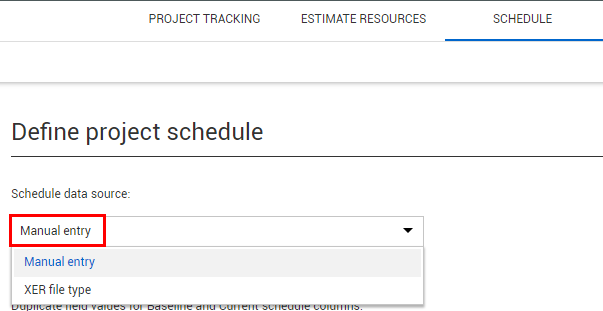
The Excel import can only be accomplished if the Control > Settings > Schedule setting is set to Manual Entry.
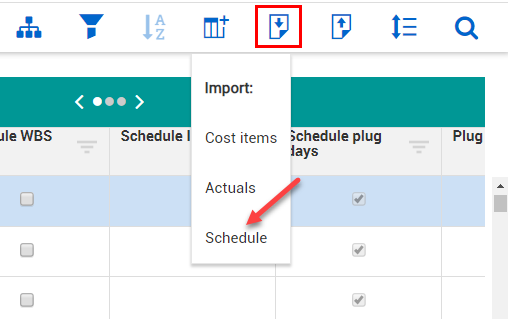
From the CBS tab of the Control Workspaces page, select the Import icon on the top right menu bar, then click Schedule.
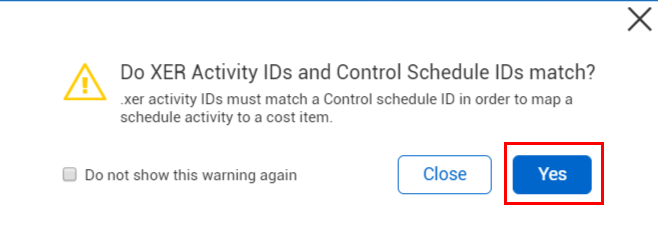
A warning message appears asking if the XER Activity Ids and Control IDs match. Click Yes if both IDs match before continuing.
In the Import schedule data window, click on the Browse icon in the Drag and drop file portion of the screen.
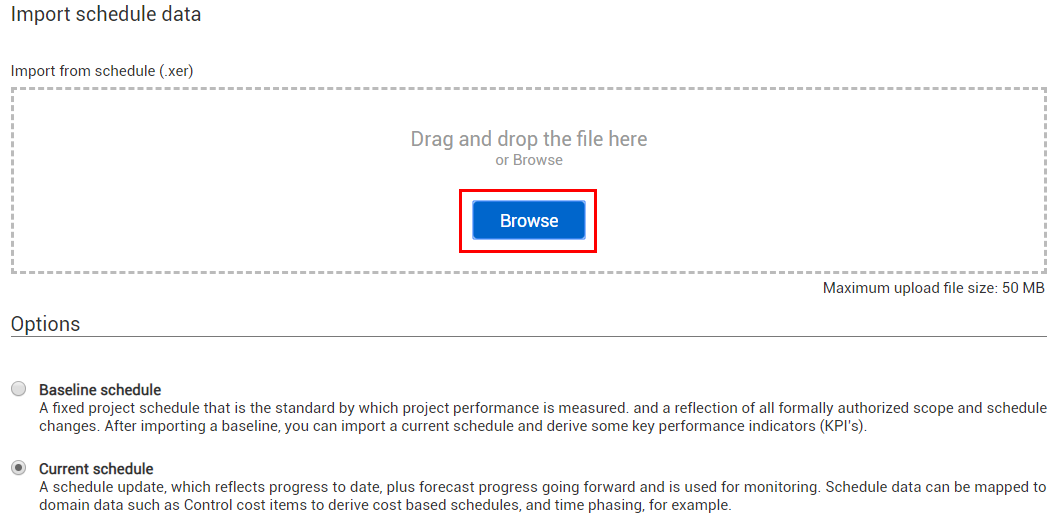
In the Import schedule data window, click on the Browse icon in the Drag and drop file portion of the screen.
Select the desired .XER file that was generated in Primavera.

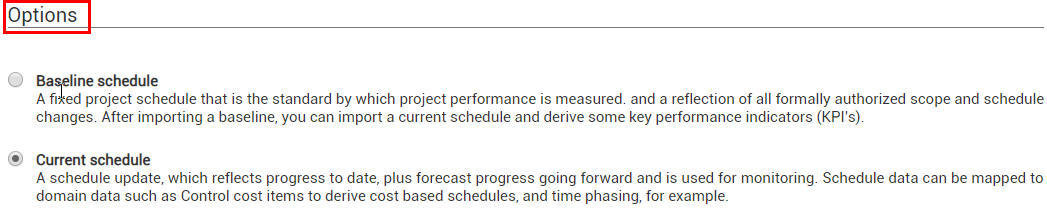
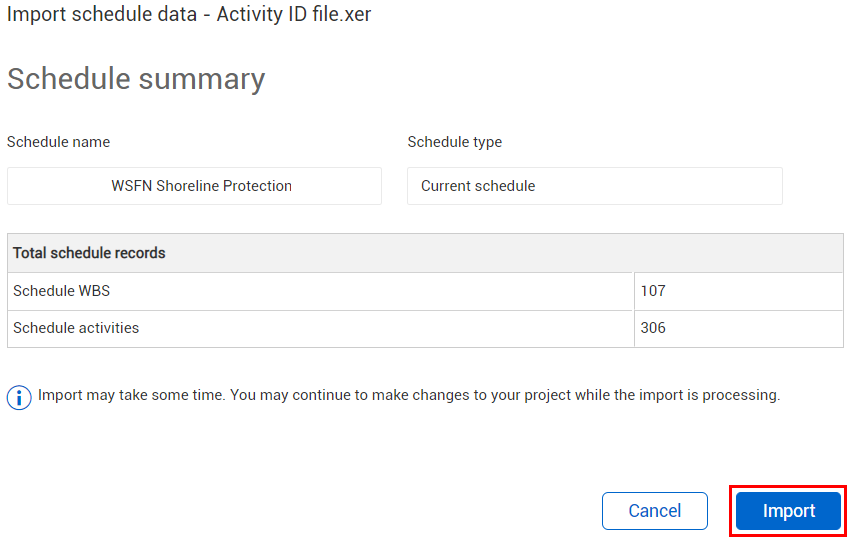
In Options, select either the Baseline schedule or Current schedule for the schedule type that you want to import.
Select Next.
Select Import after reviewing the Schedule summary.
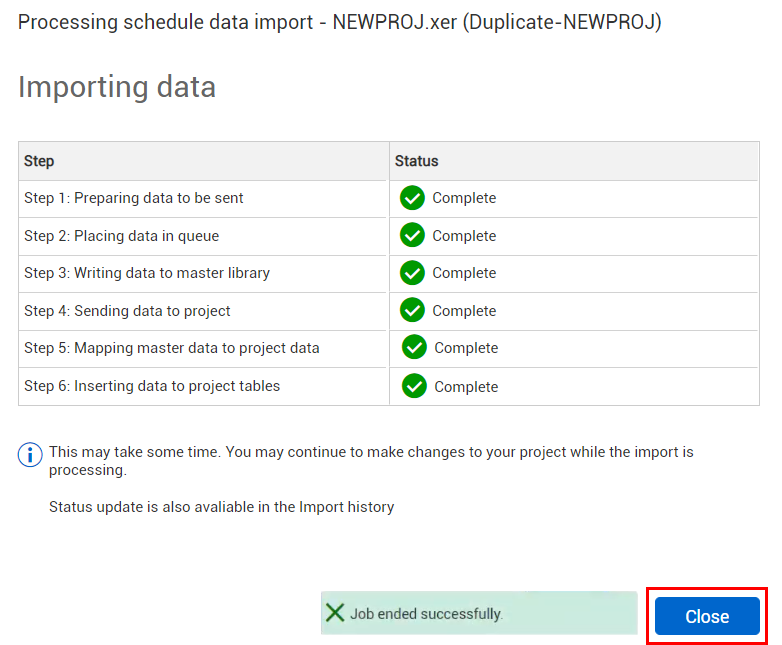
The Importing data process screen displays the current status for each step of the .XER data import.
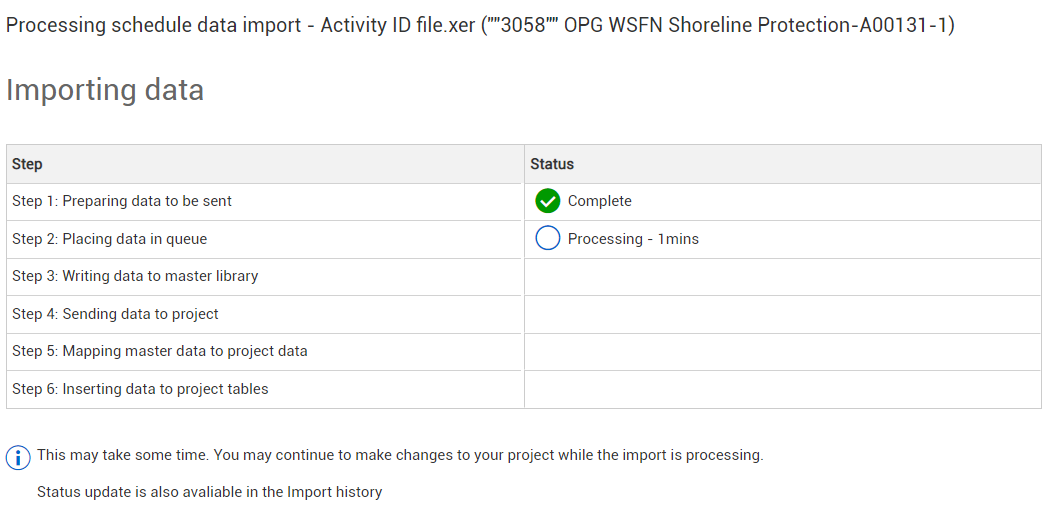
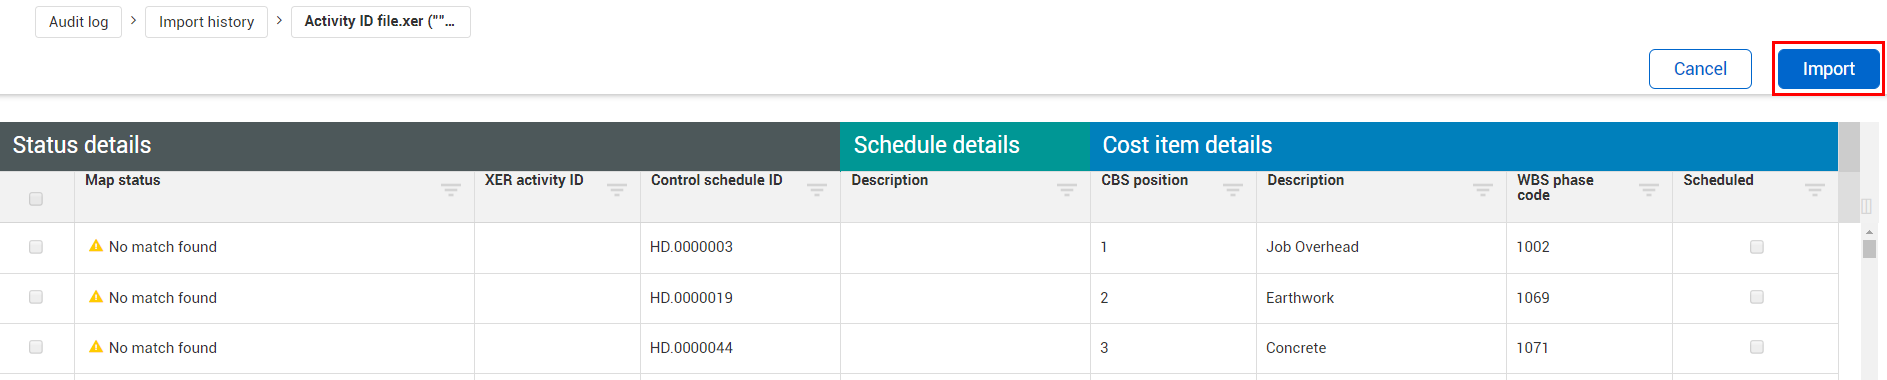
If there are errors in any of the steps, you can click on the Pending unmapped items found link to make the corrections
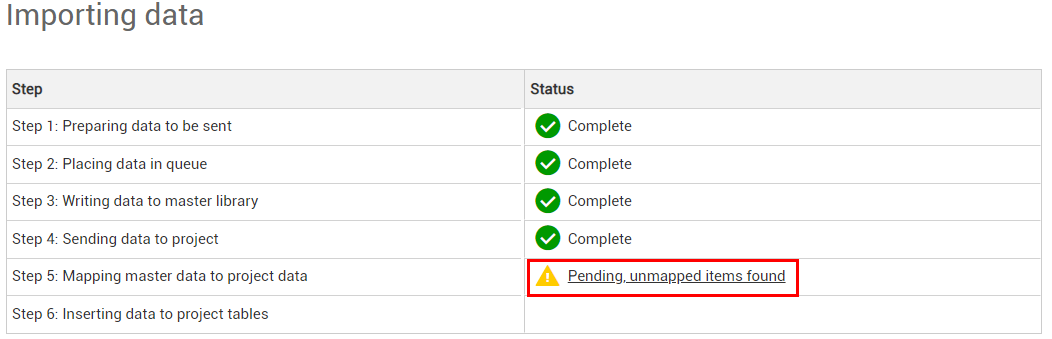
You can also navigate to Audit Log > Import history to view the import status, which includes the Total line items imported

If there are corrections to be made, once completed, you can select Import to re-import the data.
When the import is successful, select the Close button.
Check the Control: Schedule block for newly imported scheduled dates
This is a quick audit to make sure that the desired Primavera dates imported successfully into Control

From the CBS tab of the Control Workspaces page, select the Export icon on the top right menu bar, then click Schedule as XER.
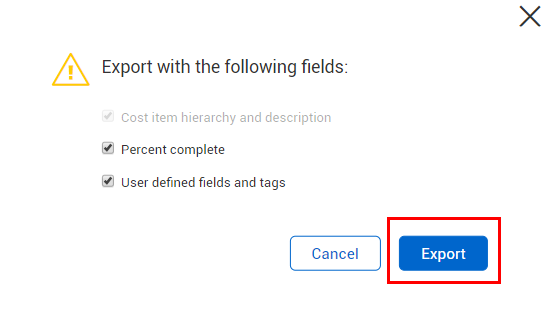
Assuming you have Percent Complete and User defined Fields and tags turned on in your settings, click Export.
Depending on what you’d like to export, you can always uncheck undesired options
After selecting Export, an XER file will generate and be placed within your C:/Downloads folder. The file will be named <job name>(Schedule).xer

At this point you are ready to import the XER file into Primavera
Additional Information
9977 N 90th Street, Suite 250 Scottsdale, AZ 85258 | 1-800-637-7496
© 2024 InEight, Inc. All Rights Reserved | Privacy Statement | Terms of Service | Cookie Policy | Do not sell/share my information